Two tips for pain-free lunges

Lunging is a foundational movement pattern. But if you struggle to lunge without pain, you’re not alone.

Unfortunately, many people have been lunging with poor form for years.

Performing countless reps in questionable positions can lead to joint pain and degradation. It certainly won’t make you feel stronger or more confident.

Why does this happen?

Lunges are a staple in fast-paced group exercise classes where there isn’t much time to emphasize using good form. Instructors are usually coaching dozens of people and aren’t able to provide appropriate modifications for everyone.

Some trainers also throw their clients into advanced lunging variations before they’re ready. I know because I used to be one of these trainers! I’ve definitely put clients in questionable positions because I didn’t understand how to adapt my programming to fit the needs of the person in front of me.

In recent years, I’ve spent many hours building a deeper understanding of movements like lunging. I’ve learned that in order to build a strong lunge, most people need to take a step back and build strength in the supporting muscles and joints.

Lunges – especially walking lunges or any barbell-loaded lunges – are not a good fit for many people at their current skill level. But that doesn’t mean you can’t work up to these movements if you’re smarter with your training.

Below are two tips to consider if you want to learn how to do great lunges without all the pain and struggle.

Build your lunges on a solid foundation.

Using a simpler variation of a movement can make all the difference between training with pain and awkwardness and building strength, resiliency, and confidence. This is especially true with complex unilateral movements like lunging.

If lunging hurts, you need to back up and build strength with other related exercises.

The most basic regression of a lunge is a single leg glute bridge. I start here when I’m working with clients who have a lot of knee pain. This movement allows you to practice pushing through one leg without placing as much stress on your joints.

Next, I progress clients to split squats. A split squat is essentially a stationary lunge.

Lunging requires you to step in and out of position, which means you’re decelerating against higher forces. If you can’t demonstrate balance, stability, and strength with split squats, you’re definitely going to struggle with lunging.

Beginning in half kneeling – as shown below – is a great way to establish a strong starting position. You’ll figure out exactly where to place your feet and learn how to produce force from the ground up.

Many people will need to spend a significant amount of time working on split squats before they’re able to safely progress to lunging. Don’t rush through this step!

When they’re ready, I finally get my clients lunging. I always start with reverse lunges because they are the most similar to split squats and are less demanding on the knees.

Eventually, some of my clients to progress to more advanced variations like walking lunges, side lunges, and MAX lunges. However, I’m never in a hurry to move to the next step. You are always better off spending more time with a less complex exercise than trying to do something new and flashy.

Build better core connections.

When you lunge, forces are acting on the body in multiple planes: forward and backward, side to side, and even rotationally.

Many people experience pain during lunging not because their legs are weak, but because their body isn’t stable enough to resist those side and rotational forces.

This is why your knees cave in, your feet roll around, and you fall sideways or lose your balance.

The best way to fix this is through smarter core training.

You need to learn to create more internal stability and build muscular connections that run across your body. This means using exercises that activate your lats, core muscles, and glutes at the same time.

The press out is a great example of this, especially if you perform the exercise in half kneeling (which is the basic position of a lunge). You learn how to use your entire core – including your lats – to stay strong, upright, and balanced while manipulating the position of your limbs.

Another great core exercise to help you with lunging is the lateral drag. You can perform these with a sandbag, kettlebell, or dumbbell. Focus on grabbing the floor with your toes and with the down arm. Go slowly and fight to resist rotation as you drag the weight underneath your body.

I want all my clients to eventually perform some variation of a lunge. But in order to get there without pain, we have to be smart and strategic with our training.

Start by using single-leg variations that place less stress on your joints. Focus on performing each exercise with great form and only move on the next progression when you feel strong and confident at your current level.

Along the way, supplement your lower body training with appropriate core exercises. The best core exercises to help with lunging are those that teach you to resist rotation and connect muscles across different sides of your body. 

Utilizing these two tips will make all the difference in how you move and feel when performing lunges and other single-leg exercises.

Want to learn more about building a strong lower body without pain? Check out my free Squat and Deadlift School ebook. I share the exact progressions I use to help clients master these exercises along with tons of videos and written form cues.
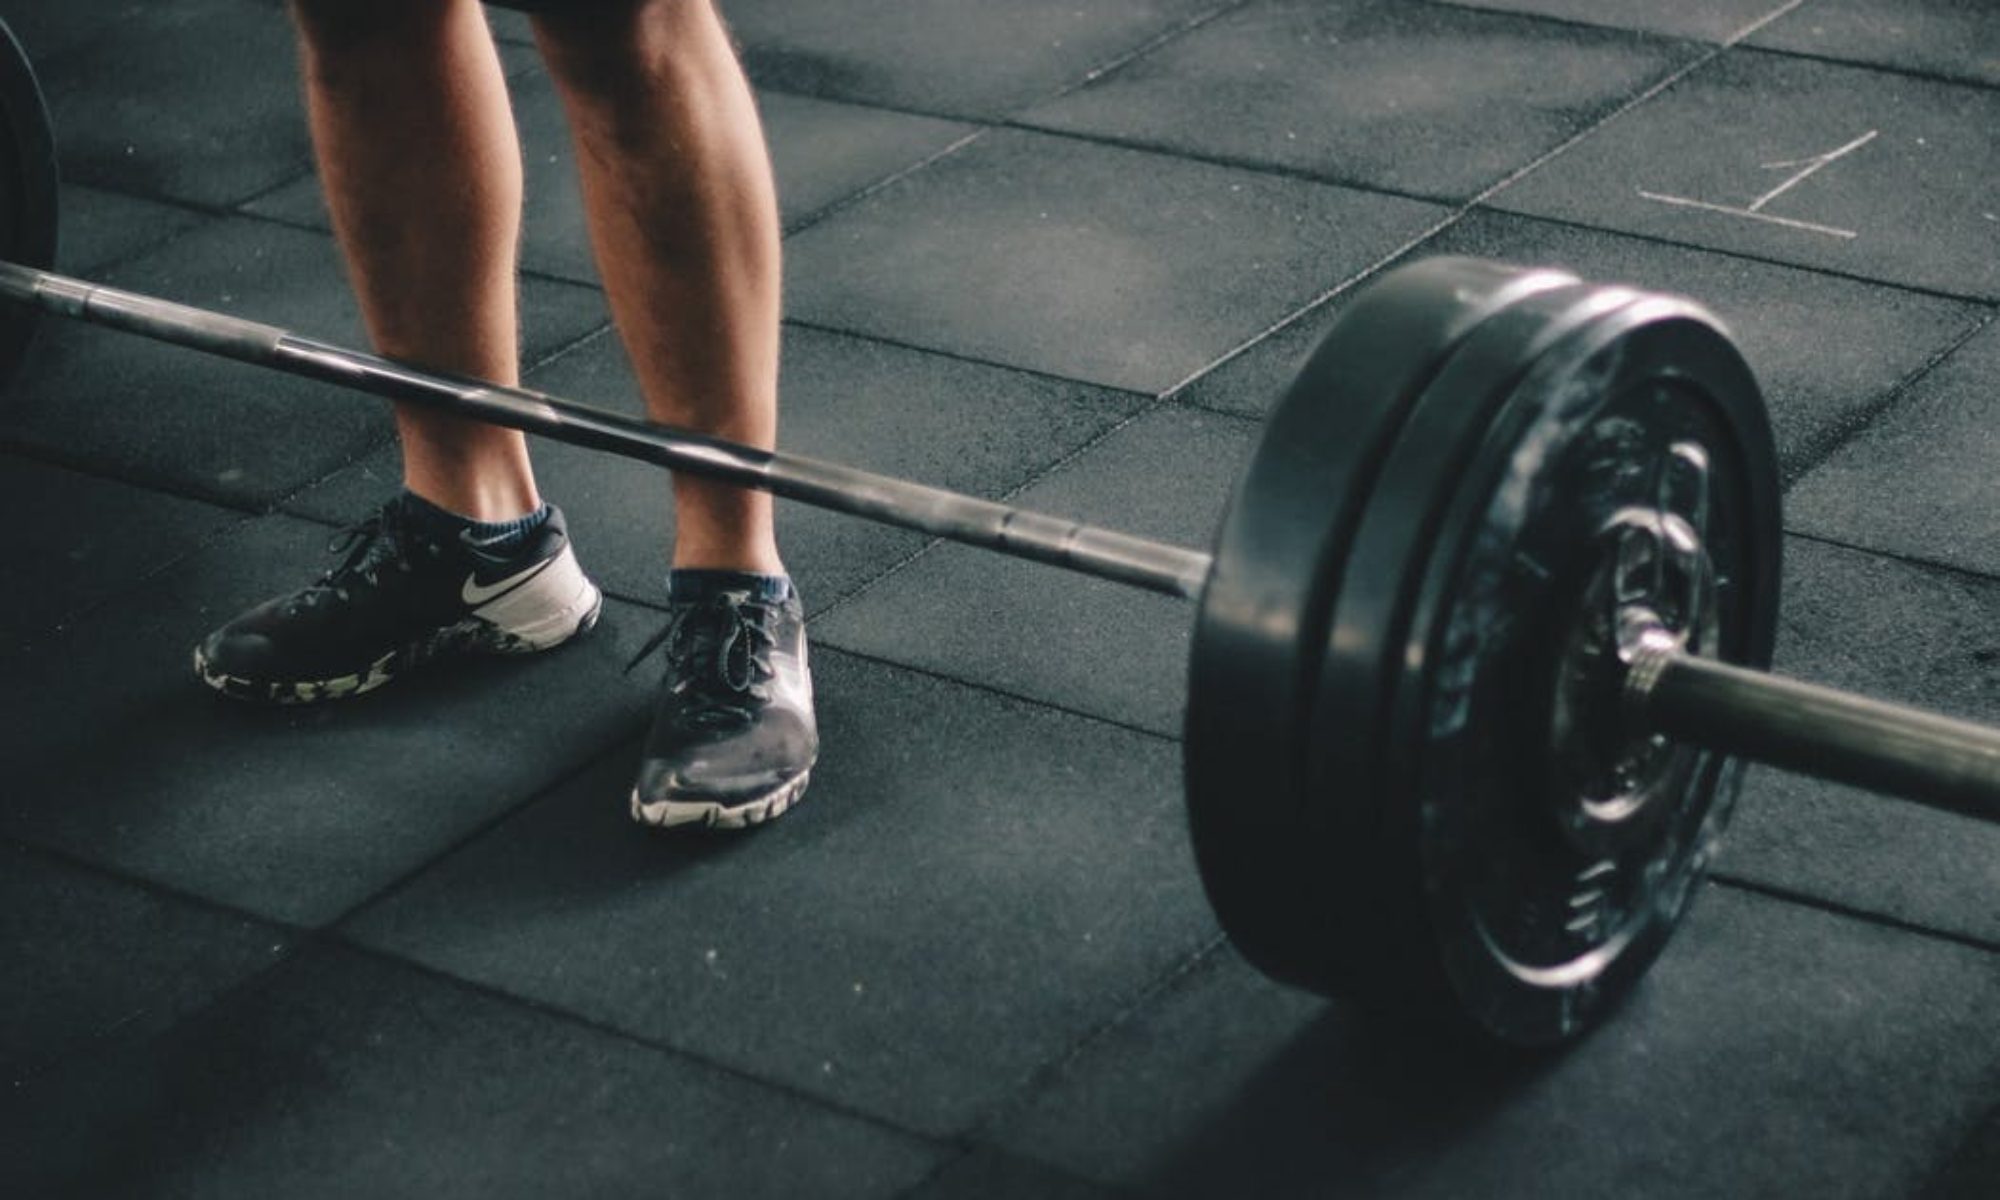
Returning to the gym? Read this first.

After months of closures, gyms around the country are slowly resuming operations.

There are plenty of people discussing all the ways to protect yourself from COVID-19 when you return to the gym. I’m not going to talk about that today, as those policies will come directly from your gym or local government.

Each person also has their own unique circumstances with work, family, and finances as well as their own personal risk tolerance, all of which could affect their decision about when to return to the gym.

Instead of digging into these issues, I want to discuss another crucial element of staying safe when you go back to the gym. It’s hard to overstate just how important this consideration is to protect yourself.

Be cautious to avoid injuries.

You are not the same trainee that you were back in early March.

If you don’t take your time easing back into full weight room workouts, you are setting yourself up for pain and injuries.

Even if you’ve been crushing your home training, your body is not in specific shape for the gym.

There is a big difference between squatting with a band or kettlebell and squatting with a barbell.

Same idea applies to other exercises. If the only pressing movements you’ve done for three months are various types of pushups, your body is no longer fully adapted for barbell – or even dumbbell – bench pressing.

Now, this doesn’t mean you’re totally out of shape if you’ve been training without access to real weights. I have clients that lost weight, built lean muscle, and are moving better than ever thanks to their quarantine workouts. You may even feel stronger and fitter than you did before the gym closed.

However, the specific stressors placed on your ligaments, tendons, and joints are different with different training tools.

Barbells in particular are not very joint-friendly and a lot less forgiving of form errors. Placing too much load and stress on delicate connective tissues before they’re ready is a great way to hurt yourself.

Getting hurt now only means more time away from the gym. Nobody wants that!

The absolute worst thing you can do when you go back to the gym is try and jump right back in to the exact workouts you were using before quarantine. 

What to do instead

  • Start with shorter workouts. Your work capacity for lifting weights is likely reduced. I recommend 30 minute workouts for at least the first two weeks. You can always fill in extra time with cardio or non-lifting activities.
  • Prioritize recovery. Get plenty of sleep, eat primarily nutrient-rich foods, drink lots of water, and go for easy walks on your off days. You can also experiment with bodywork, contrast showers, and other recovery tools.
  • Use less weight. No matter what exercise you perform, start with lighter weights than you think you can handle.
  • Be cautious about barbell training. I actually recommend avoiding barbells for the first 2-4 weeks. Focus on dumbbells, kettlebells, cables, and machines. Then, once you’re back in the swing of things, you can add barbell movements  back into the mix.
  • Consider starting a new training program. Hiring an experienced coach or trainer to guide you through this process can take a lot of pressure off your shoulders.
  • Be nice to yourself. You will likely feel pretty weak and out of shape the first time you return to the weight room. Don’t let this get you down. If you stayed active during quarantine, your gym strength and endurance will return pretty rapidly. If you were totally sedentary for the last three months, this process will probably take a little longer.

One last note – expect to be very sore when you first get back into lifting weights. In my experience, people feel the most intense soreness when they return to lifting weights after a long period away or do exercises they haven’t done in a while.

This is another reason to take it easy with lighter loads and shorter workouts until you re-acclimate to the gym.

Do you have questions or concerns about how to safely resume your gym routine? Apply for my online training program and I can provide customized plans, support, and advice to help you navigate this transition.

Training to Be Harder to Kill

Like many people, my fitness journey began because I wanted to lose weight.

By the time I got serious about this, there was more on the line than just looking a certain way. I was 19 and prediabetic, facing a future of chronic disease if I didn’t make some serious changes.

Long story short, I lost 70lbs in the first year. I fell in love with lifting weights and learned how to cook, buy groceries, and count calories. For the first time since middle school, I fit into smaller sizes and had to buy a completely new wardrobe

My second major goal – which lasted about four years – was to get as strong as possible. I was introduced to the sport of powerlifting and got hooked.

My training was all about putting up big numbers on the back squat, bench press, and barbell deadlift. I even competed in a powerlifting meet back in April 2014 where I set an all-time personal deadlift PR of 330lbs.

I’m now almost ten years into my personal fitness journey. Increasingly, my goals have shifted beyond just building a lean body and lifting heavy things.

I still want to look good and feel strong (who doesn’t?), but I’ve realized that the biggest benefit of lifting weights is how it helps you later on in life.

You have control than you think over how you age.

When most of us think about getting older, we assume that losing strength, mobility, stamina, and power is inevitable.

I know I constantly hear people saying things like “I’m just old” or “I guess this is just part of getting older.”

Here’s the thing: much of the physical decline we perceive as just part of getting older is not set in stone.

The appearance of your body may change, but you can hold on to much of its capacity if you’re stay active and prioritize resistance training.

One of the biggest drivers of age-related decline is loss of muscle mass. This causes your metabolism to slow down along with a host of other negative consequences.

But studies indicate that you can actually maintain much of your muscle mass as long as you keep using it. You don’t need to be a pro bodybuilder either; you just need to engage in some kind of regular resistance training.

Another challenge of getting older is being more susceptible to injury. Too many older people die as a result of slips and falls.

It doesn’t have to be this way – you can dramatically reduce the chances of falls by maintaining some level of balance, speed, and power.

Here are a few things you can do to train for health and longevity: 

Train all the major movement patterns. Everyone should perform some variation of a squat, hinge, upper body push, and upper body pull on a regular basis. If you want to add a few more, I also recommend training gait (walking and carries), crawling, single leg training, and rotation (both resisting and creating it).

Read more: Core training beyond crunches

Pick exercises that work for your body and skill level. Not everyone is cut out to use barbells. And if you’re intimidated by the weight room, there are plenty of other resistance training options that can work. I strongly suggest experimenting to find exercise variations that feel good for you. 

If you want help figuring out which squat and deadlift variations work for you, you can download my free Squat and Deadlift School ebook here.

Don’t do things that hurt. This is related to the point above. You would be surprised how many people push through pain during exercise because they thing it’s just part of the deal. There is always a way to to modify an exercise or train around pain. Your joints will thank you.

Read more: You got hurt. Now what?

Power training is for everyone. Being fast and responsive is what helps you prevent falls and quickly react to other stimuli in the environment. Learning how to jump and land safely is hugely beneficial. If you can’t jump, try incorporating medicine ball throws or just going for power walks from time to time.

Do mobility work every day. The last thing you want is for your minor aches and pains to turn into more serious problems or permanent restrictions. I recommend doing drills to mobilize your hips, upper back, shoulders, and ankles as often as possible.

Read more: How should I warm up?

Work on getting up and down from the floor. Being able to get up and down from the floor by yourself is hugely important for health and safety as we age. If possible, try to get up and down from the floor at least once in every workout. Turkish getups and lunges are especially helpful here.

When in doubt, keep up your cardio fitness. The best thing you can do for your health is to move every day. If all you can do is go for a short walk, make that your goal. This keeps your heart, brain, muscles, and many other systems healthy and happy.

Read more: All about cardio

I still work out to build muscle and get lean. But I also want to stay strong and maintain my independence for as long as possible.

I want to be able to climb stairs, carry my groceries, and take active vacations. I do this work now so that I’m harder to kill if I’m lucky enough to still here in a few decades.

If you’re a millennial like me, now is the perfect time to build a sustainable strength training routine. Find activities you enjoy and set meaningful goals so you can challenge yourself and stay engaged.

If you’re a little older, now is still the perfect time to lift weights or move your body in a way that’s appropriate for you.

As long as you’re still living, it’s not too late to get in better shape and reap the benefits of resistance training. If you want some help figuring out what this looks like for you, you can apply for my online training program here.

How to stay injury-free when training from home

I work with a lot of people who are recovering from injuries or dealing with pain. I love helping these clients figure out how to push themselves safely so they can get stronger, achieve their goals, and reclaim their physical fitness.

In the gym setting, there are a ton of tools I use in this process. I can tweak a movement in countless ways just by using a different implement or changing a client’s position.

Working out at home is a different story. Many of my favorite adjustments and exercises aren’t accessible or even possible. And a lot of the stuff that’s easy to do with no equipment is not a good fit for clients who deal with knee, back, and shoulder problems.

Many of the home workouts floating around the internet right now are geared toward people with zero injuries and no pain. When I see some of the suggested exercises, I wince because I know many people who attempt them are banging up their bodies unnecessarily. Then, when they feel crappy after their workouts, they may give up on home training altogether.

Thankfully, with some creativity and patience, it is possible to adjust home workouts so you can still train without aggravating (or causing) joint pain. This does require you to be a lot more discerning about which exercises you perform and which you modify or skip.

Here are five tips to help you avoid injuries and feel better during your home training.

Do you really need to do those plyometrics?

A lot of home workouts heavily feature plyometric exercises and jumping. People like these because they make them feel like they’re really working hard. And for advanced trainees, they are certainly a good way to up the intensity of a home workout.

If you’re newer to strength training or have a history of joint pain, however, it’s probably best to skip these for now. Instead, focus on building strength, coordination, and balance while staying firmly on the floor.

If you want to build power at home without plyometrics, you can also use isometric holds. Pick a movement and hold the hardest position for time. Try to squeeze every muscle in your body as hard as you can – this constant full-body tension is what drives the nervous system adaptations that make you stronger and more powerful.

Look beyond lunges

Trainees with knee problems may struggle with lunges, another staple in many home workout programs.

If your movement is very limited or you’re in pain, try replacing all single-leg exercises with glute bridge variations. You can also perform hinging and leg curl variations to build supporting strength in your joints.

If you’re only somewhat limited, you can swap lunges for exercises like split squats or step ups. There are countless single leg variations and with some experimentation, you’ll likely be able to find one or two that work for you.

Improve your pushup technique

A third potential injury risk with home training is jacking up your shoulders from too much pressing with poor form. I’ve seen a lot of cringe-worthy pushup videos on social media recently and don’t want you to be one of them.

Make sure you’re doing pushups correctly. This means no shoulder shrugging, keep your elbows within 45 degrees of your sides, use a full range of motion, and maintain proper core position.

If you’re struggling, you may need to elevate your hands on a couch or go down to your knees. It’s better to make things a little easier than to bulldoze ahead with poor technique. Your shoulders will thank you!

Don’t ignore your upper back

When I work with clients at the gym, I want their pulling volume to match or exceed their pushing volume. This is hard to do at home because it’s really tough to train your back without equipment. Combine this with the poor pushup form discussed above and you’re setting yourself up for pain and stiffness.

I strongly recommend purchasing resistance bands to help keep your neck and shoulders happy. You can use bands to perform a number of rowing variations during your home workouts. If you own your home or condo, you can also buy a TRX or rings and mount them somewhere on the wall or ceiling.

At the very least, I recommend performing several sets of band pull aparts throughout the day. This simple exercise pulls you out of your slouched computer posture, opens up the chest, and builds strength in the supporting muscles of your upper back and shoulders. 

Prioritize good movement and mobility

One of the gifts of having life disrupted in such a major way is that many of us have more time to focus on things we were neglecting before. We can’t get after the weights, but we can take the time to do some maintenance on our joints and practice moving with greater ease.

Here are some ideas:

 Even if you do nothing else during this quarantine, doing some easy bodyweight drills and stretching for a few minutes per day can do wonders for your physical and mental health.

If you’d like some help putting together home workouts, join my WFH Club. I’m emailing three done-for-you workouts to members every week. Learn more and join us here.

Have a snack…

…a movement snack, that is.

Unless you are essential personnel, you are spending a lot more time at home these days. This probably means more time sitting and working in unusual places like your couch or (in my case) on the bed in your spare bedroom.

Most of you sit at your regular offices. However, you likely have a real desk and an appropriate chair. Perhaps you’re lucky enough to have a standing or sit-stand desk. 

If you work in a big city like Chicago, you also probably walk a lot as part of your daily routine. You walk to and from the train, when you go out for lunch, and when you hit the gym after work. All of this movement adds up and helps your body and brain operate at higher capacities.

Working from home is another matter entirely. Many people actually work more hours – and therefore sit more – when they’re wfh.

Even if you do get up to do things, you are limited by your space. It takes me 10 seconds to walk from one end of my apartment to the other. Contrast that with my gym, where I have to go up and down a flight of stairs every time I want to use the restroom.

Being stuck at home means we are all moving less and sitting more. This is a recipe for feeling sore, achey, cranky, and sluggish during a time when we are already operating at high stress levels. If you’re feeling pain or soreness in unusual areas, I can almost guarantee it’s coming from the way you’re sitting and working.

One way to counteract all this sitting is to be proactive and schedule movement breaks (I call them movement snacks) in your day. You may not realize it, but after a long period of sitting and working your body and brain are going to be hungry for movement.

You can create a movement snack using any combination of movements. I generally pick three or four stretches, bodyweight movements, and drills that hit as many joints as possible. Shoulders, backs, hips, and necks tend to get particularly tight after too much sitting.

Here are four options I’ve been using a lot:

Walkout + pushup + 3 point lunge each side + walk back, repeat 3-5 times 

 5 standing head nods + 5 wall slides + 2 standing hip CARs each side 

 5 cat cows + 5 hip rockers + 3 squat to stand w/ rotation 

 3 bodyweight squats + 2 shoulder CARs on each side

After any movement snack, walk around your home for 1-2 minutes before sitting down and resuming work or Netflix.

For best results, I suggest having a movement snack every hour on the hour. You can set a recurring alarm on your phone or computer to remind you that it’s time for a break.

If every hour seems like too much, or if that will seriously disrupt your work flow, do every 90 minutes or 2 hours. The important thing is to make a conscious effort to get up and move on a regular basis.

Building movement snacks into your wfh routine is one small thing you can do to feel better right now. If you want more help designing home workouts, join my WFH club. I’m sending members three done-for-you home workouts three times every week. Learn more and join us here.

Not seeing gym results? You’re probably making this mistake.

People usually fall into one of three groups when they come to the gym:

  1. They show up with no plan or only a vague idea of what they want to work on that day. They wander around the gym using whatever equipment is available, hitting their favorite exercises, and copying what they see others doing.
  2. They complete a random workout from an influencer’s plan or app. Although they’re following a prescribed workout, each session doesn’t necessarily build on the others.
  3. They do the same workout(s) they’ve been doing for years, with the exact same exercises, sets, reps, and weights they always use.

There’s absolutely nothing wrong with doing what you want at the gym. Everyone trains for different reasons, and if you’re just trying to move your body and fit some activity into your day then it really doesn’t matter what you do.

However, if you have specific goals you’d like to achieve, such as getting stronger, losing weight, building muscle, or moving with less pain, I strongly recommend you take a different approach.

Changing your body in any meaningful way requires consistency, effort, and building specific skills over time. If you come to the gym with a random plan (or worse, no plan), you’re wasting valuable time and leaving potential progress on the table. And if you always do the same things, your body will eventually stop responding. We must strike a balance between too much new stuff and not enough new stuff to consistently move forward.

I’m a true believer in long-term workout programs built around core movements and progressive overload. If you’re tired of wasting time at the gym or aren’t sure why you’re not seeing results, maybe it’s time to change the way you work out.

The Novelty Trap

Everyone wants to have a good time when they come to the gym. Since it’s often hard to find the motivation to train, it makes sense that we’d like to have fun while we’re there.  This becomes a problem, however, when we derive all our enjoyment from novelty or are afraid we’ll get bored if we don’t constantly try new things.

Social media exacerbates our exercise ADD. We scroll through our instagram feeds for inspiration and see all kinds of new and crazy exercises. Our favorite celebrity is doing one thing, a pro athlete we admire is doing another, an old classmate is promoting a new exercise system, and a fitness model we follow is doing something entirely different. It’s tempting to pick and choose a little bit of everything we see. This results in random workouts that may be fun but do very little to advance us toward our goals.

Too much novelty leaves us trapped in learning mode. Each time we go to the gym, we devote tons of time and energy to figuring out how to perform new exercises. If you’ve ever tried to learn a new movement, you know it’s tough to push yourself on your first few tries. This is because your brain is not initially efficient at telling your muscles when and how to move. If we don’t give our nervous system time to adapt, we’re never truly able to drive desired adaptations like fat loss, muscle gain, or increased strength. We need time and practice to be able to push our bodies to improve.

You know what I think is entertaining? Getting results. Repeating workouts (with smart progression over time) will always give you more bang-for-your-buck than reinventing the wheel each time you hit the gym.

Read more: Why motivation doesn’t work (and what to do instead)

But don’t I need to confuse my muscles and keep my body guessing?

The idea that you can trick your body into making progress by constantly switching up your workouts was popularized by workout programs like P90X. Muscle confusion is one of those appealing myths that seems like it could be true but isn’t actually rooted in science.

You need fewer changes than you might think to continue progressing over time. I often have my clients work on the same three or four basic strength exercises for several months. I add variety by changing the number of sets and reps performed each month. When the reps are lower, the client will be lifting heavier weights. If I then bump the reps up again and the client can still lift the heavier weight, we’ll know we are making good progress. Even a slight change in sets and reps can also totally change the demands and feel of an exercise. I’m happy because my client is improving through repeated practice, and my client is happy because they feel engaged in the training process.

Read more: How often should I switch exercises?

Another benefit to keeping your workouts simple is that you’ll have exercises and training techniques in reserve for when progress slows or you want a total change of pace. If you’re constantly performing every exercise you know, you’ll be stuck when you hit an inevitable plateau. There’s nothing for you to change and no new direction you can go. You’re more likely to injure yourself and less likely to get really good at anything.

Read more: How to bust through training plateaus

Finally, understand that underneath all the flashy instagram workouts or new products they’re promoting, every person with a great body is performing (or did perform for many years) primarily boring workouts filled with basic exercises that everybody knows. This is true for bodybuilders, pro athletes, crossfitters, and fitness models. I guarantee that 80-90% of their time at the gym is spent doing simple things you probably already know how to do. You just don’t see this stuff online because it’s not as sexy and it doesn’t sell new workout programs.

Want better results? Get back to basics and push yourself.

Only a few things truly matter at the gym if you want to build a lean, strong, and healthy body. You will always be leaving results on the table if you ignore these principles in favor of exotic exercises, flashy workout techniques, and too much novelty. 

No matter what goals you’re chasing, you should train all of the foundational human movement patterns every week. Everyone needs to perform some variation of a squat, hip hinge, lunge (or other appropriate single leg exercise), upper body push, upper body pull, and loaded carry. Pick exercises that are appropriately challenging and don’t bang up your joints.

When in doubt, simplify. You can get a lot of mileage out of seemingly basic exercises like goblet squats, dumbbell Romanian deadlifts, pushups, rows, and farmer carries.

You need to train with intensity if you want to see results. Your workouts should push your physical and mental limits while still allowing you to recover. Challenge yourself with heavy loads, more sets, less rest, or intensity techniques.

Repeating workouts several times helps you find your groove and generate more intensity. In my experience, the sweet spot of most programs occurs in the third or fourth week. This is when people feel most comfortable with the exercises and can lift the most weight or perform the most sets.

Focus on progressive overload. Over time, you should see your gym performance improve. This could mean lifting more weight, doing more sets and/or reps, taking less rest, using better form, being more explosive, or progressing to more challenging exercise variations (eg progressing from a kettlebell deadlift to a trap bar deadlift). If you’re not getting better in measurable ways over the long term, you need to take an honest look at your workouts and/or your effort.

If you’re serious about your results, you need to commit to a long-term workout program. I write four-month training blocks for most of my clients. I’ve found this is an ideal amount of time to build essential skills and see noticeable progress toward a goal. Even if you don’t follow a three or four month program, I strongly recommend repeating one set of workouts for four to six weeks before switching things up.

Finally, trust the process and be consistent. Getting stronger, losing weight, building muscle, or rehabbing an injury all take time, focus, and hard work. If you keep showing up and appreciate all the little moments along the way, you’ll have a much better chance to achieve lasting success.

Have I convinced you that your workouts need an upgrade? Here are two ways to move forward:

Sign up for online coaching. I design 100% customized, structured, long-term workout plans based on your unique needs. I also offer nutrition and lifestyle coaching and accountability check-ins to support you with your goals. 

Purchase Full45, a done-for-you three month training program designed for busy professionals who want to get stronger and leaner. Train your entire body twice a week for 45 minutes using these client-tested workouts.

Can’t back squat? Try these front-loaded squats instead.

I lost 70 lbs and built strength using traditional barbell exercises like conventional deadlifting, bench pressing, overhead pressing and back squats. I loved this training style and assumed my clients would too.

However, I quickly learned that barbell lifting is not a good fit for many people. I was blessed with good mobility and no past injuries, but many of my clients were not so lucky. Forcing clients to use the barbell led to frustration for everyone. I began to experiment with other ways to load all my primary movements.

Since my first year as a trainer, I’ve become much more conservative about programming barbell exercises. The barbell exercise I program least frequently is the back squat.

Back squatting is touted as the holy grail of lower body training, but it’s not a good fit for most people. You need lots of core strength and good upper back and shoulder mobility to hold a bar on your back; in my experience, few people possess all three of these. This means it’s incredibly easy to slip into bad habits and squat with poor form. Additionally, because you can naturally support more weight on your back, people frequently overdo the weight. This can lead to breakdown of form and injuries, especially in the knees, shoulders, and lower back.

If you can’t back squat, what should you do instead? Front-loaded squats are the solution. Holding a weight in front of you forces you to use your core, back, and other stabilizing muscles just to stay upright as you squat. Keeping your arms in front of you reduces the mobility demands on your upper body, making it easier to use proper form and maintain good posture. Front squats are self-limiting and prevent you from using more weight than you can truly manage. Training intensely with less weight means you’ll get stronger without the excessive wear and tear on your joints.

I’ve listed my four favorite front squat variations below.

Goblet Squat

Goblet squats are the first weighted squat I introduce with all my clients. They are easy to perform and versatile. Even the strongest trainees who have used a barbell for years can benefit from heavy or high rep goblet squatting.

All you need to perform a goblet squat is a single dumbbell or kettlebell. Keep the weight tight against your chest throughout the movement. If you’re holding a kettlebell, try to rip the handle apart in your hands. If you’re holding a dumbbell, try to squish the weight between your hands. These cues will help you maintain upper body and core tension, which will allow you to squat more weight with better form.

Because it doesn’t require much equipment, goblet squatting is a great option for people who frequently travel or train at a bare bones gym. Unfortunately, these gyms can limit stronger trainees if they only have dumbbells up to 50-75 lbs. If you find yourself in this situation and want to make your goblet squats more challenging, try using one of the following intensity techniques:

  • Add more reps: If you’ve never performed 20 rep sets of squats, you’re in for a treat.
  • 1.5 reps: Squat all the way down, come halfway up, go all the way down, and then come all the way up. That’s one rep.
  • Eccentric focus squats: Go really slow on the way down and stand up explosively. Start with a three second descent, but feel free to challenge yourself with even longer times.
  • Pause squats: Add a pause in the bottom of your squat. Start with three seconds and add time to increase the difficulty. Be sure to maintain tension and good posture during the pause.

Double front rack kettlebell squats

Double front rack kettlebell squats are another easily accessible front squat variation. I often use these as a progression for clients who have a good grasp of goblet squats but still aren’t ready for a barbell. They also work well later in the workout as a vehicle for extra volume and endurance work. You’ll need access to multiple pairs of kettlebells of increasing weights to progress this exercise, so it won’t be a good fit for readers who train at standard commercial gyms.

To perform this exercise, rack a kettlebell in each arm. Aim to keep your forearm and wrists vertical like a rocket ship about to launch. Holding weights in the front rack provides a great additional challenge for your core, upper back, and shoulders. Check out this video to learn more about the front rack position.

Zercher squats

Zercher squats require you to hold a barbell in your elbow pits. Zerchers may seem awkward at first, but many of my clients love them and claim they feel great on their joints. I’ve helped numerous clients successfully Zercher squat even when all other barbell squats were painful. If you want to return to barbell squatting after struggling in the past, or if your upper body mobility prevents you from front or back squatting, give Zerchers a try.

To perform Zercher squats, set up a barbell in a power rack just below your elbows. Most people like using a bar pad or towels wrapped around the bar, especially as the weight gets heavier. Place your feet directly under the bar and slide the bar into your elbow pits. Point your knuckles toward the ceiling, make a fist, and keep your arms pulled as tight to your chest as you can. Maintain this position as you unrack the bar, complete your set, and return the bar to the rack.

Barbell front squats

We’ve finally come to my personal favorite squat variation, the barbell front squat. Front squats aren’t for everyone: they still require a good amount of upper body mobility and core strength and can be unpleasant for those with sensitive skin or boney shoulders. If you can’t perform these without pain or discomfort, stick with one of the earlier squat variations.

There are three ways to hold the barbell during front squats. The traditional clean grip setup only works if you have great upper back, shoulder, and wrist mobility. If you’re too tight, try using a crossed-arm setup or lifting straps to help you secure the bar. Check out the video below to see each of these methods in action.

During 2018, I substituted front squatting for all my barbell back squatting. I love that I can challenge myself with heavy loads without straining my shoulders, lower back or knees, like I sometimes did when back squatting. In addition, because I’m holding the bar in front of my body, I have to be much more diligent about moving well and activating the right muscles. Since I made this switch I’ve noticed less shoulder and knee pain, more muscle definition in my legs, and a dramatic improvement in my squat form.

Unless you’re a competitive powerlifter, you don’t have to include barbell back squats in your workouts. If you love back squats and they feel great, keep doing what you’re doing. However, if you can’t seem to use good form or if back squatting leaves you feeling beat up, it’s time to try something new. Work your way through this progression or use a mix of all four front-loaded squat variations. You can build impressive levels of strength, muscle, and endurance in your lower body without ever putting a bar on your back.

Are squats still giving you trouble? Check out this blog post I wrote to troubleshoot common squat mistakes

And if you really want to take your squat (and deadlift) training to the next level, you need to download your FREE copy of my mini ebook Squat and Deadlift School below.

I share my favorite form tips, troubleshoot common problems, and provide progressions to help you work toward (or supplement) barbell training.

I’m confident both novice and experienced lifters can use the book and accompanying videos to take their training to the next level.

You Should Care About Getting Strong

I’m on a mission to help everyone I work with get strong.

Getting strong is not the first goal most people mention when they come to see me. Lots of people want to lose weight and get lean. Others want to increase energy, return to training after rehabbing an injury, get through the day with less pain, or simply develop a consistent exercise routine.

Although I always prioritize the individual client’s goal, the vast majority of their plans are centered around building strength. Over the years, I’ve seen that getting strong helps people achieve just about any health and fitness goal.

If you’re weak, it’s tough to handle the intensity or volume of workouts necessary to noticeably change your body. Getting stronger helps you increase your energy levels because you won’t get so exhausted performing daily tasks. Strong bodies recover faster from injuries and are less likely to experience pain in the future. And getting stronger helps with consistency because it’s fun and empowering to see all of the amazing things your body can do when you start regularly lifting heavy stuff.

You don’t need to put multiple plates on the bar – or even lift bars at all – to experience these benefits. Strength is relative to each person. What’s heavy for my clients in their mid twenties looks very different than what’s heavy for my clients in their sixties. But no matter your age or how long you’ve been working out, everyone can get stronger in their own way.

If you’re not convinced that getting strong matters for you, please read on.

Getting stronger improves every other physical quality.

Are you interested becoming more powerful to help you dominate your rec sports or golf game? Getting stronger helps with this.

Are you a runner or triathlete trying to shave minutes off your best race time? Building physical strength is one of the best ways to do it.

Many new clients want to increase their flexibility. In many cases I find they actually lack strength and neuromuscular control, not range of motion. Once I get them on a well-rounded strength training program, their flexibility almost always increases without any extra stretching or foam rolling.

Talk to any great strength and conditioning coach for young athletes and they’ll tell you they prioritize building strength over just about anything else. This is because getting stronger elevates all other physical qualities including speed, agility, conditioning, power, and mobility and flexibility.

Trying to improve any of these skills with a weak client or athlete is a recipe for lackluster results or potential injury. Strength is the base upon which everything else is built.

strong runner race weight lifting
Getting stronger has helped my marathon runners set big PRs.

Getting stronger can help you feel better and reduce the risk of future pain and injuries.

These days, it’s rare to meet a new client who doesn’t suffer from some kind of joint or muscle pain. Knee pain, shoulder pain, and low back pain are the most common, but I’ve seen just about every imaginable combination of pain and injuries in the hundreds of clients I’ve worked with over the years.

If a client is dealing with persistent or intense pain, I always refer them out to a physical therapist or physician. But many people just need to improve their movement quality, add in more regular exercise, and build some strength.

I can’t tell you how many clients have dramatically decreased their pain levels just by consistently following a safe, smart, strength-focused training program. The quality of life increase you could experience if you start lifting weights cannot be overstated. You’re also much less likely to injure yourself in the future when you learn how to control your body and counteract hours of sitting or repetitive movements.

Getting stronger makes daily life much easier.

A couple years after I started lifting, I began to notice some surprising changes. I was able to move with ease, control, and confidence no matter what I was doing. As someone who used to always feel slow, clumsy, and weak, this was a huge change in the way I carried myself and showed up in the world. This transformation happened because I was getting stronger and building a new and powerful connection with my body.

I notice my quads and glutes engaging as I bike or climb stairs. I feel my arms, back, and core muscles turn on when I’m carrying grocery bags in from the car. I know which muscles to fire when I’m attempting to safely pick up a heavy box from the floor. After years of strength training and building these mind-muscle connections, I now feel strong doing just about everything. I use the movements I practice in the gym to aid the movements I do in my daily life.

There are so many daily tasks that get easier when you’re strong. Here are just a few common examples:

  • Lifting a heavy suitcase into an overhead bin on a plane.
  • Carrying all your groceries in one trip. Bonus points if you have to walk up multiple flights of stairs like I do.
  • Carrying kids or pets. They can both be quite heavy!
  • Moving heavy boxes or furniture
  • Climbing flights of stairs
strong strength muscle women lifting training
Being strong feels awesome.

What to do next

You can’t know all of the positive benefits getting strong will have on your life until you try. Here are a few resources I’ve put together to help you get started on your strength training quest:

I’m New to the Weight Room. Where Should I Start?

Just Getting Back in the Gym? Start Here.

Design a More Efficient Workout

5 Ways to Lift More Weight

Strength Training for Special Populations:

Why Musicians Need Strength Training

What Runners Must Know About Strength Training


Squats and deadlifts are two of the best exercises for building strength. If you want to get better at these great lifts, you need to download your free copy of my ebook Squat and Deadlift school.

I share my favorite form tips, troubleshoot common problems, and provide progressions to help you work toward (or supplement) barbell training.

I’m confident both novice and experienced lifters can use the book and accompanying videos to take their training to the next level.

The Best Exercise You Aren’t Doing: Single-Leg Deadlifts

A couple years ago, one of my regular clients started having knee problems. What started with a minor tweak outside the gym developed into a case of serious pain that required months of physical therapy.

While she was recovering, however, my client still wanted to get crazy strong and feel like a boss in the gym. Since many lower body exercises caused pain, we started spending a lot of time training single-leg deadlifts.

With single-leg deadlifts, my client was able to move lots of weight safely while also building strength in muscles which helped her recovery.

This is just one way to use gym workarounds to avoid pain and still chase your goals. A single awesome exercise can allow you to progress in multiple ways without restrictions.

This week’s blog post is the first in an occasional series I’ll write about great exercises you should perform more often. In this first edition, I wax poetic about why the single-leg deadlift is such a useful exercise and how you can master it despite its unique, challenging demands.

Why they’re awesome

Almost everyone can benefit from more posterior chain work. Years of sitting, running, or lower body workouts centered around squats, leg extensions, and leg presses consist of too much attention paid to your front side and too little attention paid to your back side. This can cause you to feel weak and stiff, and make you more vulnerable to injuries down the road.

The single-leg deadlift lights up the muscles on your backside like few other exercises. Beyond helping you feel better and get stronger, this builds muscle in your glutes and hamstrings. If you’re looking to build buns of steel and tree trunk legs, or just want to look more toned, you definitely need to include single-leg deadlifts in your training.

Single-leg deadlifts are also a great tool to help you improve your balance. Balance is important as we age, when recovering from certain injuries, and when training to maximize athletic performance.

Many people think they need to exercise on unstable and wobbly surfaces for balance training, however, the reality is that most situations that require balance happen on solid ground. Single-leg deadlifts teach you to stabilize your body on one leg without the risks of falling off a tool like a bosu ball.

Finally, as mentioned above, single-leg deadlifts are injury-friendly. I often use these with clients suffering from knee and back pain because they can usually be performed without pain. Readers with cranky knees may actually find performing single-leg deadlifts on a regular basis helps their knees feel better.

Learning the single-leg deadlift

One of the biggest obstacles to learning the single-leg deadlift is poor balance. Many people give up on this exercise after their first try because they hate wobbling around and feel they aren’t able to reap the full benefits of the movement.

Thankfully, there are several simple ways to practice single-leg deadlifts without taxing your balance. If you can master these variations, you’ll have a much easier time progressing to loaded variations.

You can use a slider to practice this exercise while keeping both feet on the floor. Start with this variation if you struggle with balance. Focus on feeling this in the stationary leg as much as possible by keeping a light touch on the slider.

After you’re comfortable with the slider, you can progress to lifting the back leg off the floor. I love this bench-assisted single-leg deadlift that I learned through Strength Faction.

Stand with one foot on the floor next to an incline bench. Place your opposite arm on the bench for balance. As you hinge backward, your arm slides down the bench in front of you. Reach your same side arm out in front of you to provide additional counterbalance.

Next, it’s time to nail down the position of the back leg. There are two variations I use to teach an active and straight back leg. First, position your back foot on a flat bench. Try to push your foot along the surface of the bench as you hinge backward.

You can also use a foam roller to guide the back leg through the movement. Hold the roller on top of your back foot. As you hinge, push the roller backward to guide your leg.

These two drills teach you to actively push your back heel to the wall behind you and keep your toes pointed at the ground beneath you.

Loading the single-leg deadlift

Once you’ve mastered the basic mechanics, it’s time to load the single-leg deadlift up with weights. I use a progression that moves from least balance demand to most balance demand.

The first way I load the single-leg deadlift is with a landmine. I love using the landmine as a teaching tool because it allows you to push into it to stabilize yourself if you lose your balance.

As you use more weight, or if you have small hands, it can become difficult to grasp the barbell. Lifting straps can help you load an appropriately challenging amount of weight.

Next, I have clients hold two dumbbells or two kettlebells at their sides in the suitcase position. If you want an extra challenge, you can also use a loaded barbell. Barbells and kettlebells can be set on the ground and done in a bottoms-up variation. To keep things simple, just hold the dumbbells and kettlebells in your hands and hinge back as far as you can without worrying whether or not you set them on the ground.

Finally, load the single-leg deadlift contralaterally by holding a weight in one hand on the side opposite the leg on the ground. This is the most challenging loading variation because you’ll need to use your core to resist rotation. Only attempt this variation if you feel confident in your balance and ability to execute the movement.

Want to get better at squatting and deadlifting? Download your FREE copy of my mini ebook Squat and Deadlift School below.

You Got Hurt. Now What?

When I was a junior in college, I fell and broke my wrist while skiing. My family would drive to Colorado every year to ski on the beautiful Rocky Mountain slopes and over the course of decades, none of us ever had a serious fall or sustained any injuries. Unfortunately, in late December 2012, my luck ran out.

broken wrist family skiing colorado
The day after the injury. I may be smiling, but I was in a lot of pain.

This injury was quite severe. My hand and wrist swelled up bigger than a softball; there was a huge fracture line and the upper corner of my ulna was shattered into tiny pieces. I needed surgery to repair the damaged bones and secure my wrist with a 2-inch titanium plate. I’ll never forget how I felt when I came out from anesthesia. I was so confused and overwhelmed that I started bawling in the recovery room!

broken wrist xray injury
My bionic arm

After surgery, I began a long recovery process to heal and regain normal use of my arm and hand. At the time I was still studying music and I needed my left arm and wrist to support my trombone. I was also well into my second year of powerlifting and anxious to get back into the gym. So I can relate the feelings of frustration many of my clients feel when dealing with injuries. I hated not being able to do the things I loved and felt like all my progress both in music and in the gym was slipping away as I worked through physical therapy.

broken wrist scar musician injury
I was so happy when I could finally hold my trombone again.

Ultimately, I was lucky to make a full recovery. I owe a lot to my talented surgeon and physical therapist. But I also followed a series of steps to ensure I was truly ready to return to my normal life without any additional setbacks.

Many of my in-person clients come to me after an injury to help them get back into the gym with a smarter, safer approach. Below are the three most important considerations I make to help these clients transition smoothly.

Make sure you’ve been fully cleared to work out.

Just because you’re itching to get back in the gym doesn’t mean you’re ready. Certain injuries, especially broken bones or anything requiring surgery, can take a long time to heal. If you return to the gym before you’re fully recovered, you risk re-injuring yourself.

If you’re still undergoing treatment or therapy, you can ensure a faster and more complete recovery by diligently performing any additional exercises assigned to you. When I broke my wrist I found this “homework” incredibly dull and annoying. But by doing it anyway, I breezed through therapy and regained full range of motion in my fingers, hand, and wrist.

On a related note, please take care of yourself and get the care you need if you think you may be injured. I’ve met with several new members at my gym who were dealing with consistent pain or limitations but for whatever reason, refused to see a doctor. I won’t work with clients like this because it’s not fair to me or to them. Your future self will thank you if you get checked out!

You can ask your doctor and/or physical therapist when they think you’ll be ready to train. When they give you the green light, you can safely return to the gym following the guidelines I’ll discuss below. If not, it’s best to wait until you’ve been fully cleared.

Train smarter

Even when you’ve been cleared for exercise, you should not jump right back into your old training regimen. This is especially true if you injured yourself working out.

Start slow and do less than you think you can in your initial workouts. Back off your weights and reduce your workout time. Don’t do anything that causes pain or has been specifically forbidden by your doctor or physical therapist. You may need to find alternative exercises for your old standbys.

For example, I work with many clients recovering from shoulder injuries. Direct overhead pressing is out of the question for these clients. However, they can still train their shoulders and use pressing movements. I work with them to master proper shoulder mechanics using rows and horizontal pushing. Next, I teach them to safely press using a landmine. You can get a great training effect using landmine pressing without the risk of pressing directly overhead. Workarounds like this exist for every conceivable injury; you just need to be smart and get creative.

Although it’s tough to generalize since injuries vary so widely, it’s usually wise to avoid barbell lifts for a while. Instead, use bodyweight exercises or load movements with bands, cables, dumbbells, and kettlebells. If after a month of training you’re feeling pretty good, then you can start adding back in your favorite barbell lifts.

Note – I wrote a whole series of blog posts about training around specific injuries, including my favorite workarounds and preventative exercises for each injury. Check them out here: Low back Part 1 and Part 2, Knees Part 1 and Part 2, Shoulders Part 1 and Part 2.

Don’t be afraid to challenge yourself.

Don’t be the person who spends all their gym time foam rolling and performing physical therapy exercises. Once you’ve been cleared to train, you will benefit more from a structured challenge than from babying yourself. Find safe opportunities within your limits to push your body and mind.

With a good training program, an eye for form, and patience, you can potentially regain much of your lost strength, mobility, and resiliency (depending, of course, on your age, the severity of your injury and the quality of the treatment you received). But if you’re perpetually scared of re-injuring yourself, you will stagnate and never get any better.

I recommend working with a qualified in-person trainer as you work your way back to full strength. It’s helpful to have a trained eye watching your form who can tell you when to push and when to pull back to avoid dangerous compensations. If you live in Chicago, please reach out to me here. If you live elsewhere, you can reach out anyway and I will try to recommend someone from my professional network.

broken wrist injury scar tattoo healing
I made the most of my injury, and you can too.

Injuries, even serious ones, aren’t a death sentence for your health and fitness goals. If you prioritize recovery and follow a structured, smart, and appropriately challenging training plan when you’re ready to return to the gym, you will still be able to push yourself and improve your life through exercise.

Want to work on squats and deadlifts without exacerbating pain and injuries? Download your free copy of my ebook Squat and Deadlift School below. I share the exact progressions and exercises I use to help clients feel strong and confident with these exercises, including ways to modify your training if you’re recovering from an injury.